33-Primsa-Client的CRUD全部api
我们学了 Prisma 的命令、schema 的语法,这节来过一遍 Prisma Client 的 api。
单表操作
findUnique
findUnique 是用来查找唯一的记录的,可以根据主键或者有唯一索引的列来查:
import { PrismaClient } from '@prisma/client'

const prisma = new PrismaClient({
  log: [
    {
      emit: 'stdout',
      level: 'query'
    },
  ],
});

async function test1() {
    const aaa = await prisma.aaa.findUnique({
        where: {
            id: 1
        }
    });
    console.log(aaa);

    const bbb = await prisma.aaa.findUnique({
        where: {
            email: 'bbb@xx.com'
        }
    });
    console.log(bbb);
}

test1();
所以,这里的 id、email 都可以:

跑一下试试:npx ts-node ./src/index.ts

但是如果指定 name 就不行了:

因为通过 name 来查并不能保证记录唯一。
你还可以通过 select 指定返回的列:
async function test1() {
    const aaa = await prisma.aaa.findUnique({
        where: {
            id: 1
        }
    });
    console.log(aaa);

    const bbb = await prisma.aaa.findUnique({
        where: {
            email: 'bbb@xx.com'
        },
        select: {
            id: true,
            email: true
        }
    });
    console.log(bbb);
}
比如我通过 select 指定返回 id、email:

那结果里就只包含这两个字段。
findUniqueOrThrow
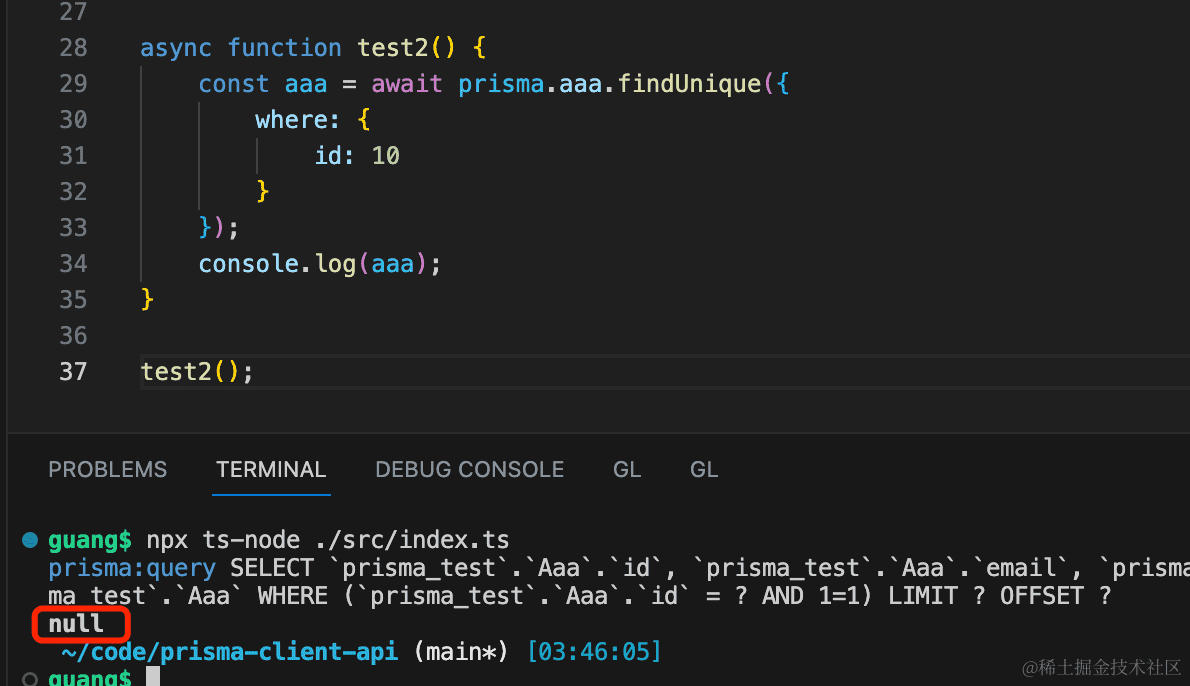
findUniqueOrThrow 和 findUnique 的区别是它如果没找到对应的记录会抛异常,而 findUnique 会返回 null。
先试下 findUnique:
import { PrismaClient } from '@prisma/client'

const prisma = new PrismaClient({
  log: [
    {
      emit: 'stdout',
      level: 'query'
    },
  ],
});


async function test2() {
    const aaa = await prisma.aaa.findUnique({
        where: {
            id: 10
        }
    });
    console.log(aaa);
}

test2();
再换成 findUniqueOrThrow 试试:
import { PrismaClient } from '@prisma/client'

const prisma = new PrismaClient({
  log: [
    {
      emit: 'stdout',
      level: 'query'
    },
  ],
});

async function test2() {
    const aaa = await prisma.aaa.findUniqueOrThrow({
        where: {
            id: 10
        }
    });
    console.log(aaa);
}

test2();
如果没找到会抛异常:

findMany
findMany 很明显是查找多条记录的。
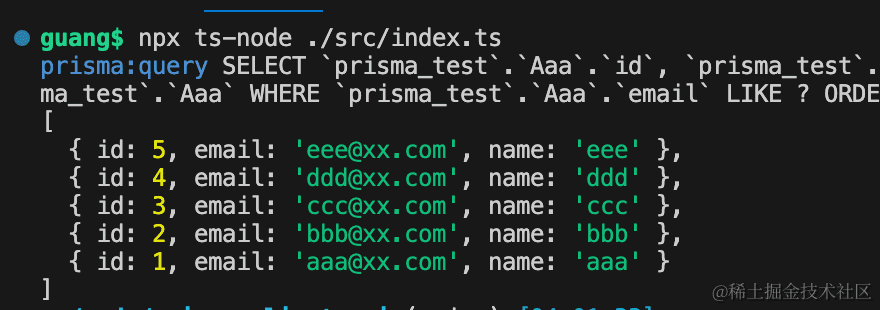
比如查找 email 包含 xx 的记录,按照 name 降序排列:
import { PrismaClient } from '@prisma/client'

const prisma = new PrismaClient({
  log: [
    {
      emit: 'stdout',
      level: 'query'
    },
  ],
});

async function test3() {
    const res = await prisma.aaa.findMany({
        where: {
            email: {
                contains: 'xx'
            }
        },
        orderBy: {
            name: 'desc'
        }
    });
    console.log(res);
}

test3();
跑一下:npx ts-node ./src/index.ts
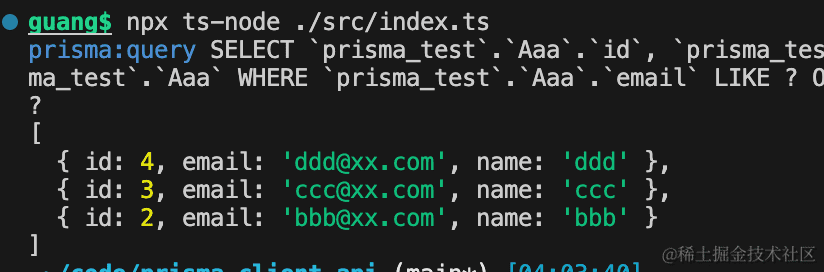
然后再加个分页,取从第 2 条开始的 3 条。
async function test3() {
    const res = await prisma.aaa.findMany({
        where: {
            email: {
                contains: 'xx'
            }
        },
        orderBy: {
            name: 'desc'
        },
        skip: 2,
        take: 3
    });
    console.log(res);
}
下标是从 0 开始的,所以是这三条:
当然,你可以再加上 select 指定返回的字段:
async function test3() {
    const res = await prisma.aaa.findMany({
        where: {
            email: {
                contains: 'xx'
            }
        },
        select: {
            id: true,
            email: true,
        },
        orderBy: {
            name: 'desc'
        },
        skip: 2,
        take: 3
    });
    console.log(res);
}

你会发现熟练 sql 之后,这些 api 用起来都很自然,过一遍就会了。
findFirst
findFirst 和 findMany 的唯一区别是,这个返回第一条记录。
async  function test4() {
    const res = await prisma.aaa.findFirst({
        where: {
            email: {
                contains: 'xx'
            }
        },
        select: {
            id: true,
            email: true,
        },
        orderBy: {
            name: 'desc'
        },
        skip: 2,
        take: 3
    });
    console.log(res);
}
test4();

此外,where 条件这里可以指定的更细致:

contains 是包含,endsWith 是以什么结尾
gt 是 greater than 大于,lte 是 less than or equal 大于等于
这些过滤条件都很容易理解,就不展开了。
此外,还有 findFirstOrThrow 方法,那个也是如果没找到,抛异常,参数和 FindFirst 一样。
create
这个我们用过多次了,用来创建记录:
async  function test5() {
    const res = await prisma.aaa.create({
        data: {
            name: 'kk',
            email: 'kk@xx.com'
        },
        select: {
            email: true
        }
    });
    console.log(res);
}
test5();
它同样也可以通过 select 指定插入之后再查询出来的字段。

createMany 我们用过,这里就不测了:

update
update 明显是用来更新的。
它可以指定 where 条件,指定 data,还可以指定 select 出的字段:
async function test6() {
    const res = await prisma.aaa.update({
        where: { id: 3 },
        data: { email: '3333@xx.com' },
        select: {
            id: true,
            email: true
        }
    });
    console.log(res);
}

test6();
跑一下:npx ts-node ./src/index.ts

可以看到,打印了 3 条 sql:
首先根据 where 条件查询出这条记录,然后 update,之后再 select 查询出更新后的记录。
updateMany 自然是更新多条记录。
比如你想更新所有邮箱包含 xx.com 的记录为 666@xx.com

用 update 会报错,它只是用来更新单条记录的,需要指定 id 或者有唯一索引的列。
这时候改成 udpateMany 就可以了。
async function test7() {
    const res = await prisma.aaa.updateMany({
        where: {
            email: {
                contains: 'xx.com'
            }
        },
        data: { name: '666' },
    });
    console.log(res);
}

test7();

在 mysql workbench 里可以看到,确实改了:

upsert
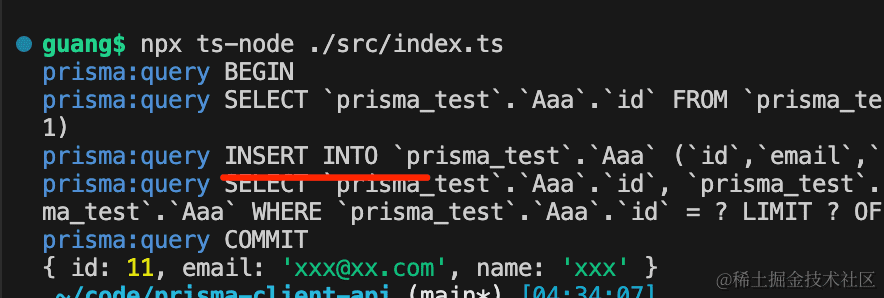
upsert 是 update 和 insert 的意思。
当传入的 id 有对应记录的时候,会更新,否则,会创建记录。
async function test8() {
const res = await prisma.aaa.upsert({
where: { id: 11 },
update: { email: 'yy@xx.com' },
create: {
id: 11,
name: 'xxx',
email: 'xxx@xx.com'
},
});
console.log(res);
}
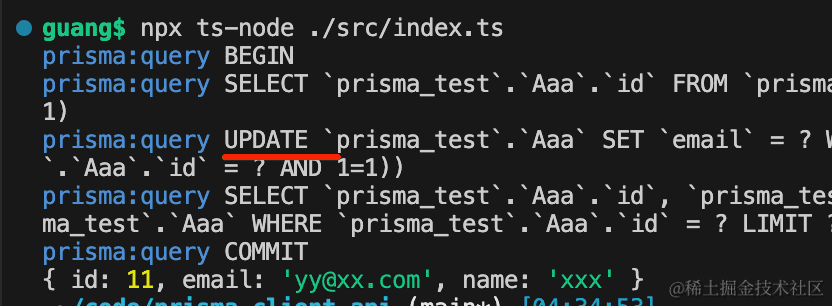
test8();
第一次跑执行的是 insert:

第二次跑就是 update 了:

delete
delete 就比较简单了,我们和 deleteMany 一起测试下:
async function test9() {
    await prisma.aaa.delete({
        where: { id: 1 },
    });

    await prisma.aaa.deleteMany({
        where: {
            id: {
                in: [11, 2]
            }
        }
    });
}

test9();

可以看到有两条 delete 语句。

可以看到 3 条记录都被删除了。
count
count 其实和 findMany 参数一样,只不过这里不返回具体记录,而是返回记录的条数。
比如 findMany 是这样的:
async function test10() {
    const res = await prisma.aaa.findMany({
        where: {
            email: {
                contains: 'xx'
            }
        },
        orderBy: {
            name: 'desc'
        },
        skip: 2,
        take: 3
    });
    console.log(res);
}
test10();

把 findMany 改为 count 就是这样了:
async function test10() {
    const res = await prisma.aaa.count({
        where: {
            email: {
                contains: 'xx'
            }
        },
        orderBy: {
            name: 'desc'
        },
        skip: 2,
        take: 3
    });
    console.log(res);
}
test10();

aggregate
aggregate 是统计相关的。
它除了 where、orderBy、skip、take 这些参数外,还可以指定 _count、_avg、_sum、_min、_max 这些。
不过我们现在的表里没有数字相关的列。
改一下 model:

model Aaa {
  id    Int     @id @default(autoincrement())
  email String  @unique
  name  String?
  age Int       @default(0)
}
然后创建一个新的 migration:
npx prisma migrate dev --name bbb

对应的 sql 如下:

然后我们用代码改一下:
async function test11() {
    await prisma.aaa.update({
        where: {
            id: 3
        },
        data: {
            age: 3
        }
    });

    await prisma.aaa.update({
        where: {
            id: 5
        },
        data: {
            age: 5
        }
    });
}
test11();
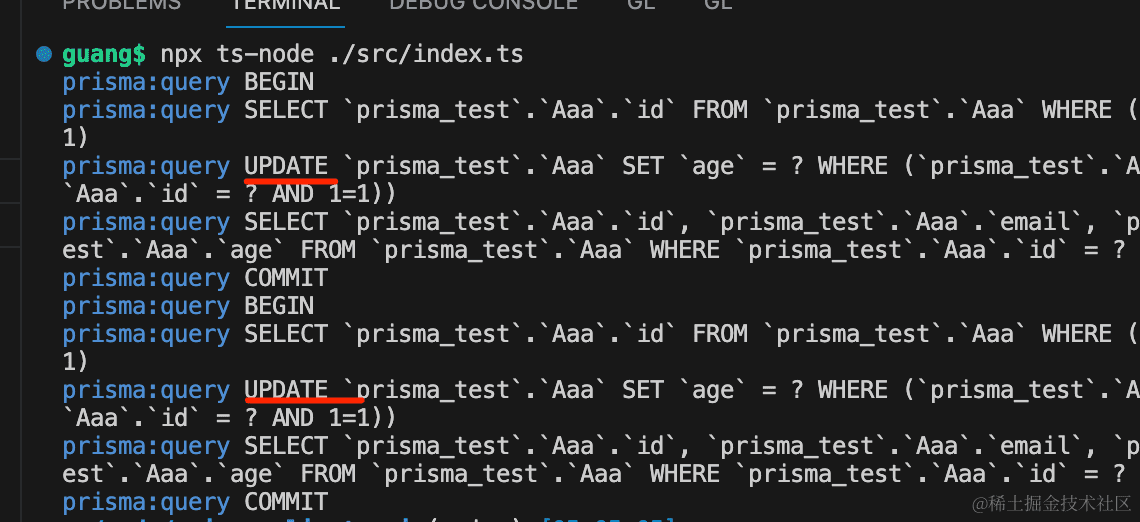
在 mysql workbench 里刷新下,可以看到确实改了:

接下来就可以测试 aggregate 方法了:
async function test12() {
    const res = await prisma.aaa.aggregate({
        where: {
            email: {
                contains: 'xx.com'
            }
        },
        _count: {
            _all: true,
        },
        _max: {
            age: true
        },
        _min: {
            age: true
        },
        _avg: {
            age: true
        }
    });
    console.log(res);
}
test12();
跑一下:

可以看到返回的最大值、最小值、计数、平均值,都是对的。
groupBy
最后还有个 groupBy 方法,大家有 sql 基础也很容易搞懂,这个就是分组的。
async function test13() {
    const res = await prisma.aaa.groupBy({
        by: ['email'],
        _count: {
          _all: true
        },
        _sum: {
          age: true,
        },
        having: {
          age: {
            _avg: {
              gt: 2,
            }
          },
        },
    })
    console.log(res);
}

test13();
就是按照 email 分组,过滤出平均年龄大于 2 的分组,计算年龄总和返回。
结果如下:

因为 age 大于 2 的就 2 条,然后算平均值、计数,就是上面的结果了:

多表操作
设置datasource 的 provider 为 mysql,并且添加 model
generator client {
provider = "prisma-client-js"
}
datasource db {
provider = "mysql"
url = env("DATABASE_URL")
}
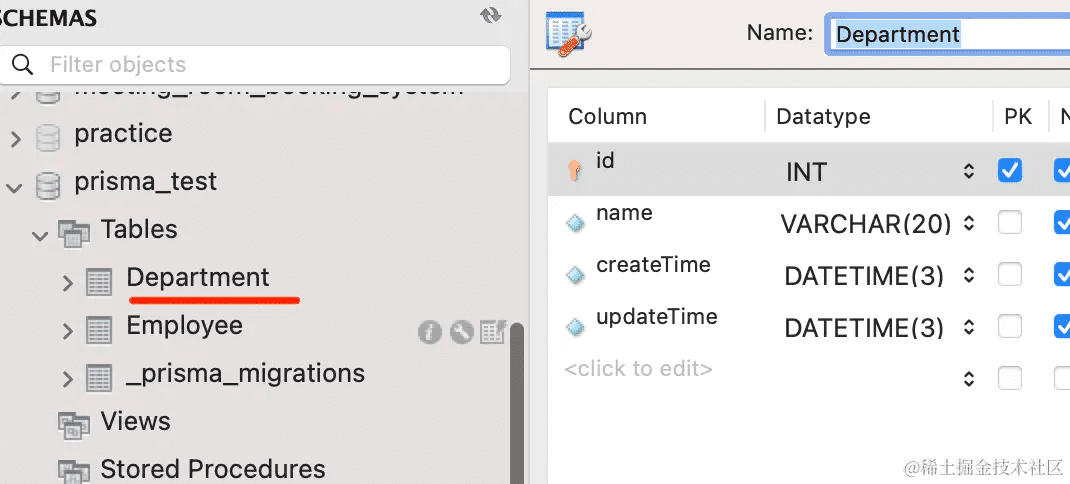
model Department {
id Int @id @default(autoincrement())
name String @db.VarChar(20)
createTime DateTime @default(now())
updateTime DateTime @updatedAt
employees Employee[]
}
model Employee {
id Int @id @default(autoincrement())
name String @db.VarChar(20)
phone String @db.VarChar(30)
deaprtmentId Int
department Department @relation(fields: [deaprtmentId], references: [id])
}
之后执行 migrate reset 重置下:npx prisma migrate reset
然后用 migrate dev 创建新的迁移:npx prisma migrate dev --name aaa
生成了 client 代码,还有 sql 文件。

数据库中也多了这 2 个表:

然后来写下 client 的 crud 代码。
首先安装 ts、ts-node 包:npm install typescript ts-node @types/node --save-dev
创建 tsconfig.jsonnpx tsc --init
把注释删掉,保留这些配置就行:
{
  "compilerOptions": {
    "target": "es2016",
    "module": "commonjs",
    "types": ["node"],
    "esModuleInterop": true,
    "forceConsistentCasingInFileNames": true,
    "strict": true,
    "skipLibCheck": true
  }
}
创建 src/index.ts
import { PrismaClient } from '@prisma/client'

const prisma = new PrismaClient({
  log: [
    {
      emit: 'stdout',
      level: 'query'
    },
  ],
});

async function main() {
}

main();
然后分别做下 CRUD
插入数据
首先是插入数据:
import { PrismaClient } from '@prisma/client'
const prisma = new PrismaClient({
log: [
{
emit: 'stdout',
level: 'query'
},
],
});
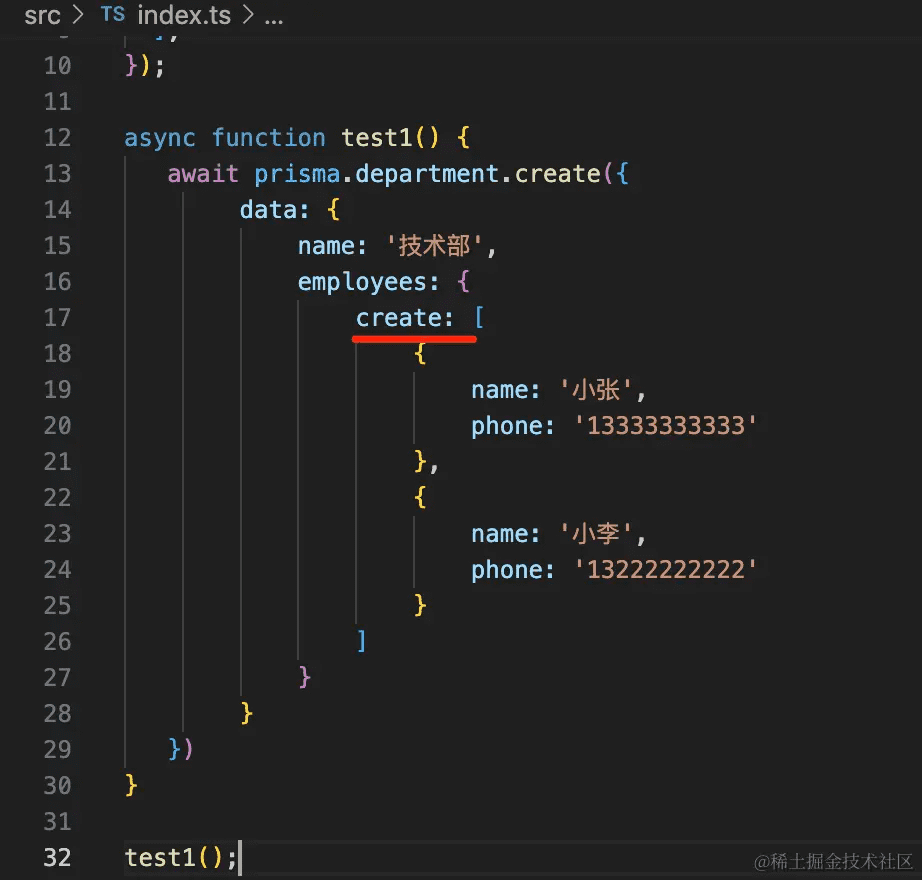
async function test1() {
await prisma.department.create({
data: {
name: '技术部',
employees: {
create: [
{
name: '小张',
phone: '13333333333'
},
{
name: '小李',
phone: '13222222222'
}
]
}
}
})
}
test1();
插入关联 model 的数据的时候,也是用 create 指定:
测试下:npx ts-node ./src/index.ts

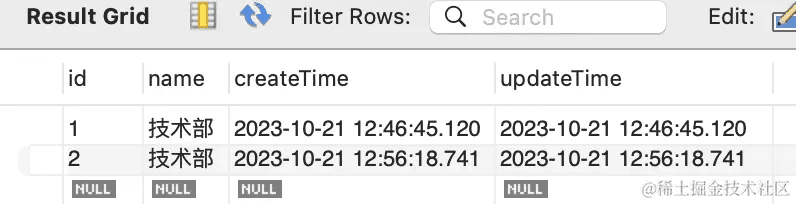
在 mysql workbench 里看下结果:


确实,数据都被正确插入了。
当然,你也可以用这种写法:

async function test2() {
    await prisma.department.create({
         data: {
             name: '技术部',
             employees: {
                 createMany: {
                    data: [
                        {
                            name: '小王',
                            phone: '13333333333'
                        },
                        {
                            name: '小周',
                            phone: '13222222222'
                        }
                    ],

                 }
             }
         }
    })
}

test2();
跑一下:

效果一样:

关联查询
那如何关联查询呢?
可以这样写:
async function test3() {
    const res1 = await prisma.department.findUnique({
        where: {
            id: 1
        },
        include: {
            employees: true
        }
    });
    console.log(res1);

    const res2 = await prisma.department.findUnique({
        where: {
            id: 1
        },
        include: {
            employees: {
                where: {
                    name: '小张'
                },
                select: {
                    name: true
                }
            }
        }
    });
    console.log(res2);

    const res3 = await prisma.department.findUnique({
        where: {
            id: 1
        }
    }).employees();
    console.log(res3);
}

test3();
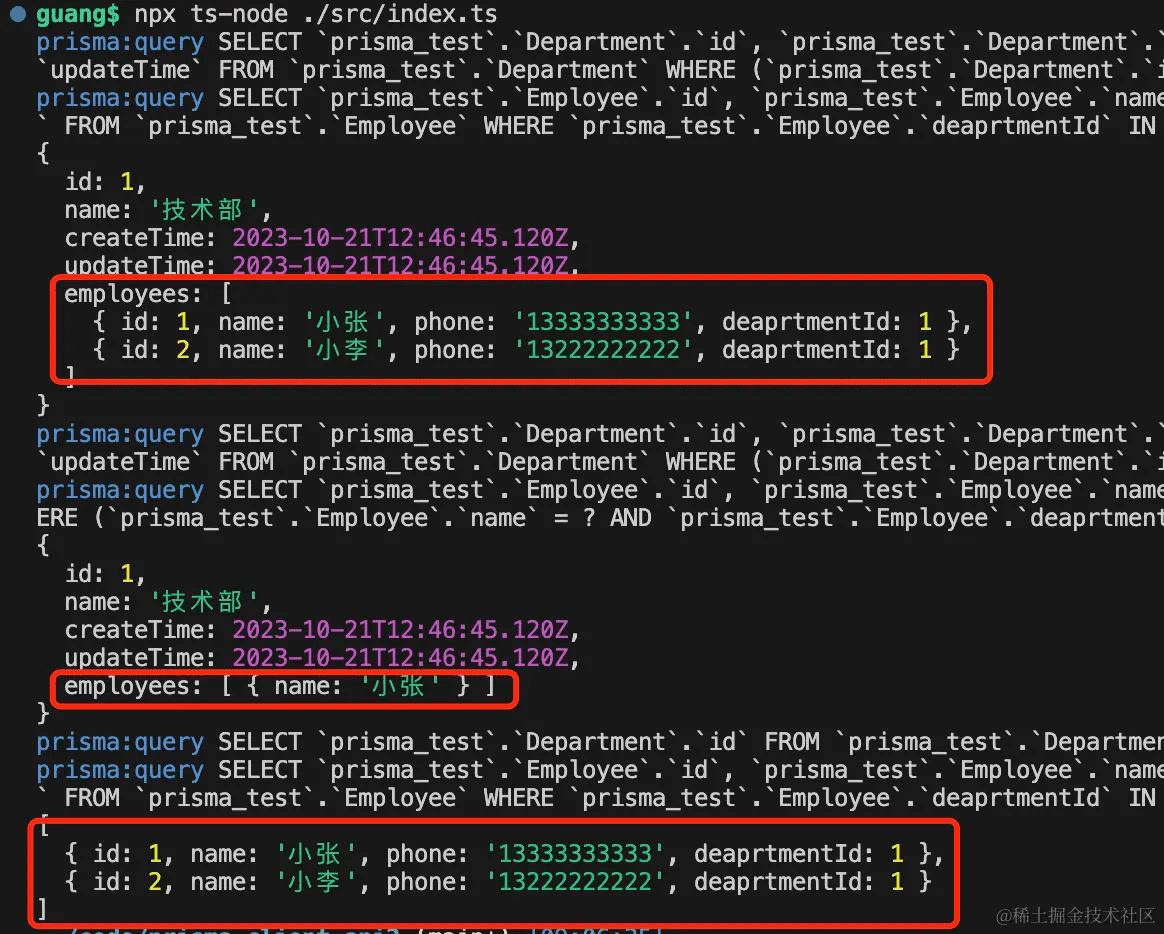
查询 department 的时候,通过 include 指定关联查询出 employees。
include 还可以指定 where 等查询的参数,进一步过滤。
此外,你也可以在查出 department 后调用 empolyees() 方法来查询。
可以看到,都能正确查出关联数据:
关联更新
再就是关联更新:
async function test4() {
    const res1 = await prisma.department.update({
        where: {
            id: 1
        },
        data: {
            name: '销售部',
            employees: {
                create: [
                    {
                        name: '小刘',
                        phone: '13266666666'
                    }
                ]
            }
        }
    });
    console.log(res1);
}

test4();
比如我在更新 department 的时候关联插入了一条 employee 的记录。
跑一下:
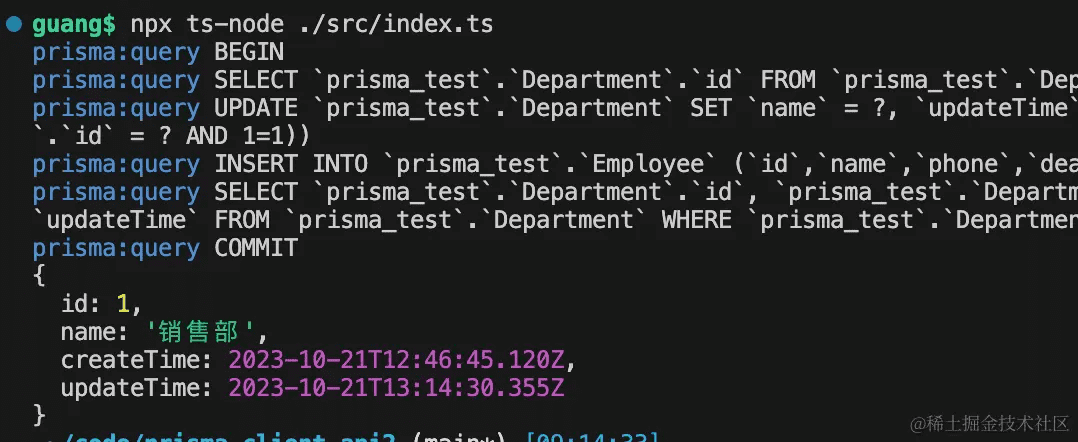
在 mysql workbench 里可以看到,id 为 1 的 department 更新了:
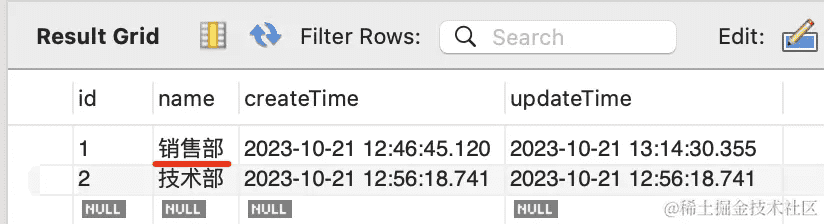
关联插入了一条 employee 的记录:


更新 department 的时候,除了可以插入 empolyee 的数据,也可以和别的 empolyee 建立关联。
比如 id 为 4 的 empolyee:

现在他关联的是 id 为 2 的 department。
我们 update 的时候使用 connect 和它关联:
async function test5() {
    const res1 = await prisma.department.update({
        where: {
            id: 1
        },
        data: {
            name: '销售部',
            employees: {
                connect: [
                    {
                        id: 4
                    }
                ]
            }
        }
    });
    console.log(res1);
}
test5();

跑一下:

刷新可以看到,id 为 4 的 employee 关联的 department 就变了:

如果是某个 id 的数据存在就 connect,不存在就 create 呢?
可以这样写:
async function test6() {
    const res1 = await prisma.department.update({
        where: {
            id: 1
        },
        data: {
            name: '销售部',
            employees: {
                connectOrCreate: {
                    where: {
                        id: 6
                    },
                    create: {
                        id: 6,
                        name: '小张',
                        phone: '13256665555'
                    }
                }
            }
        }
    });
    console.log(res1);
}
test6();
第一次跑,执行的是 insert:


第二次跑,就是 update 了:

也就是说,update 的时候可以通过 create、connect、connectOrCreate 来插入新的关联 model 的记录或者关联已有的记录。
当然,create 的时候也可以这样:

效果一样,就不一个个测试了。
删除
再就是删除:
如果我们想删除 id 为 1 的 department 的所有 empolyee,可以这样写:
async function test7() {
    await prisma.employee.deleteMany({
        where: {
            department: {
                id: 1
            }
        },
    });
}
test7();


这就是多个 model 关联时的 CRUD。
执行sql
此外,Prisma 还可以直接执行 sql:
async function test8() {
    await prisma.$executeRaw`TRUNCATE TABLE Employee`;

    const res = await prisma.$queryRaw`select * from Department`;
    console.log(res);
}
test8();

这样,当上面的 api 都不能满足需求的时候,你就可以直接执行 sql。
案例代码在小册仓库